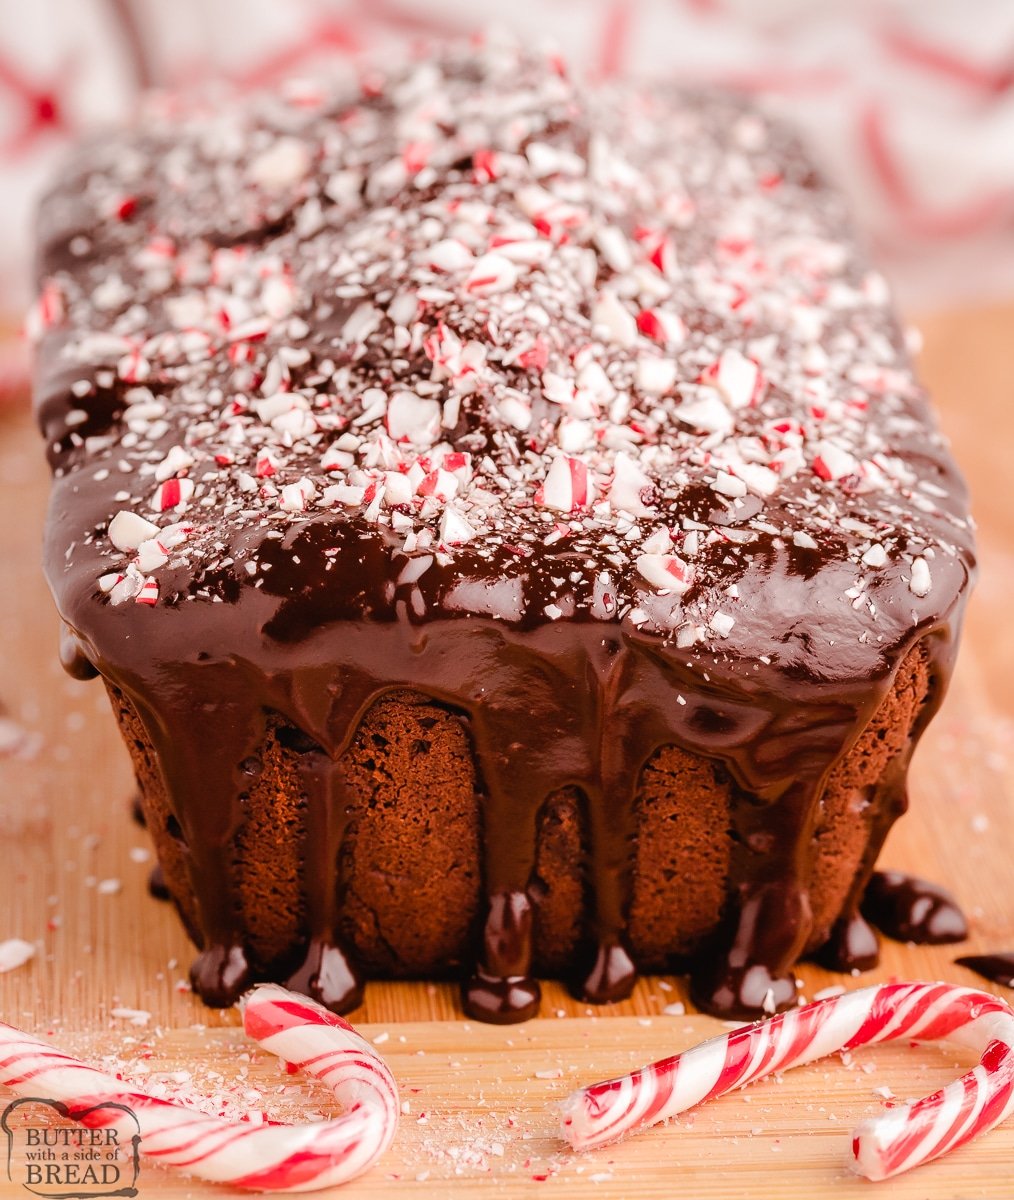
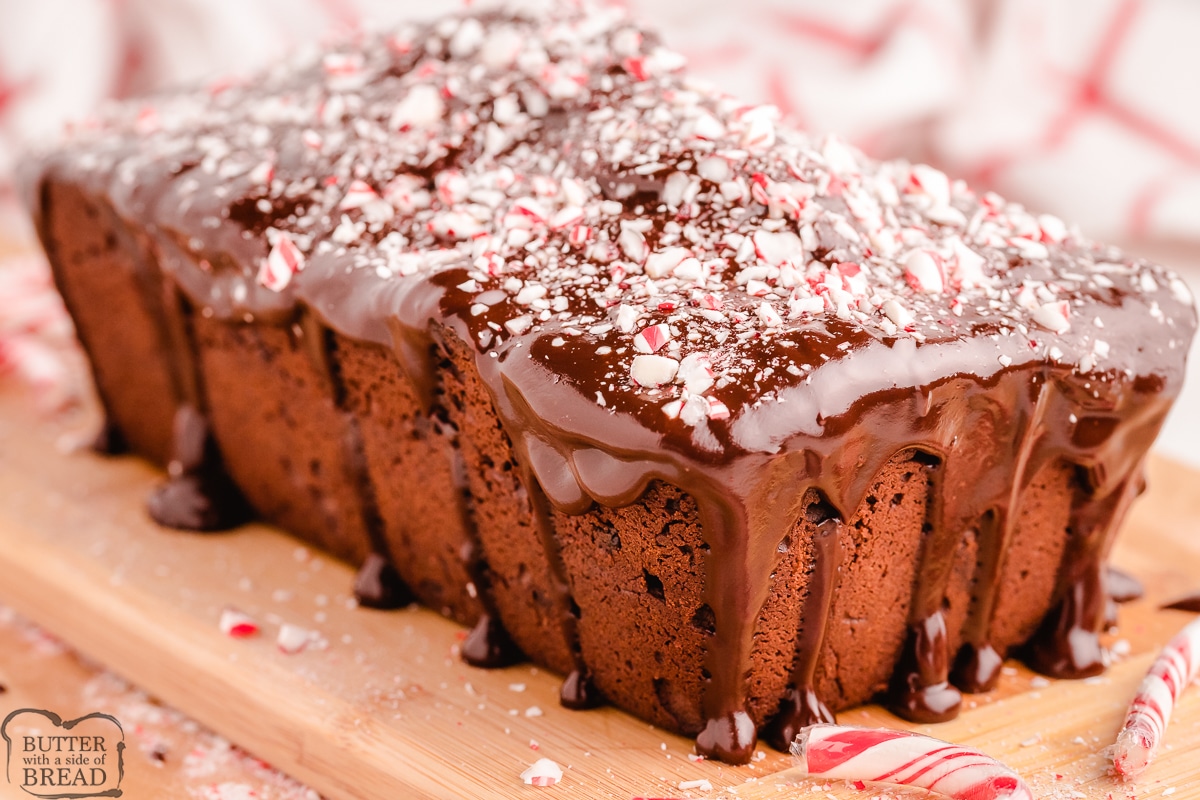
Chocolate Peppermint Bread packed with rich cocoa, creamy sour cream, and melty chocolate chips, creating a decadent holiday loaf with festive peppermint flavor in every slice!
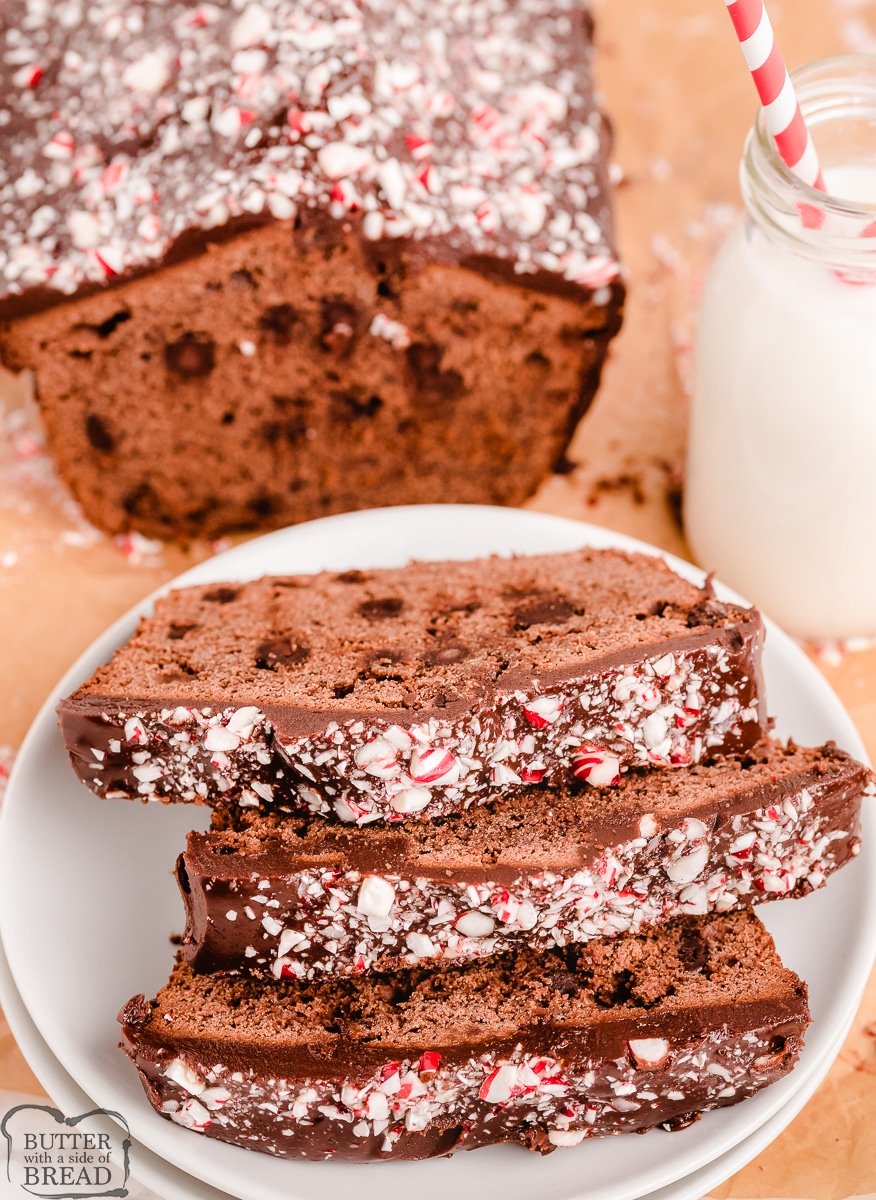
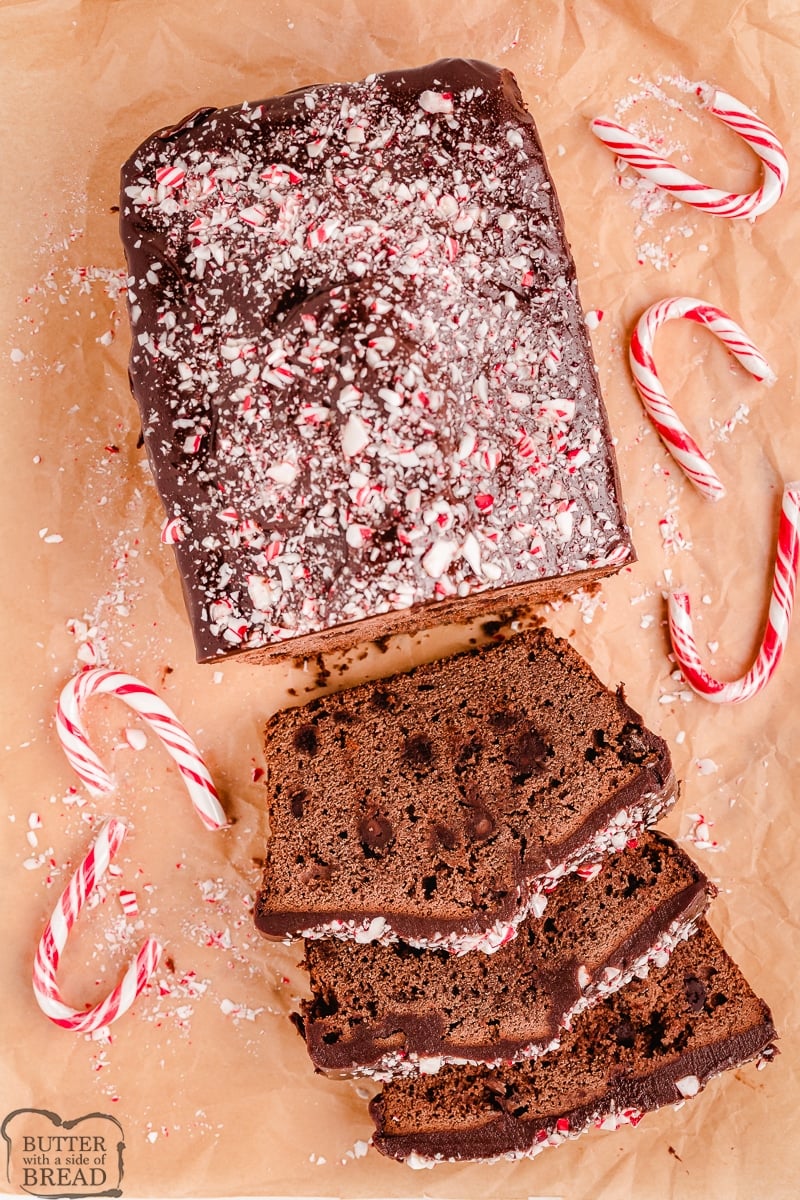
If you love the classic winter combo of chocolate and peppermint, this Chocolate Peppermint Bread is absolutely the treat for you! It’s not overly sweet, making it easy to justify as breakfast, a festive afternoon snack, or a delicious slice to enjoy with hot cocoa. With rich, cake-like texture and incredible flavor in every bite, it’s sure to be a pleasant surprise at holiday gatherings. One batch makes one full loaf or three adorable mini loaves—perfect for gifting to friends and family.
Why you’ll love this Chocolate Bread
- Perfect holiday flavor – rich chocolate and refreshing peppermint create a classic winter combination everyone loves.
- Versatile treat – enjoy it for breakfast, dessert, or a festive mid-day snack with coffee or cocoa.
- Great for gifting – bake one large loaf or three mini loaves that make beautiful, homemade holiday gifts.
Chocolate Loaf Cake Ingredients
Butter: You need ½ cup of softened butter for the fat needed for a moist, tender crumb.
Sugar: Sweeten the loaf and create a soft, light texture.
Eggs: 2 eggs bind ingredients together and provide structure so the bread doesn’t crumble.
Sour cream: Use sour cream for added moisture and richness while keeping the bread soft and cake-like.
Flour: 1 ¾ cups of all-purpose flour forms the base of the bread structure.
Cocoa powder: Deliver deep chocolate flavor throughout the bread by adding cocoa powder.
Baking powder: This leavening agent helps the bread rise and become fluffy.
Salt: Use 1 tsp salt to enhance and balance the flavors.
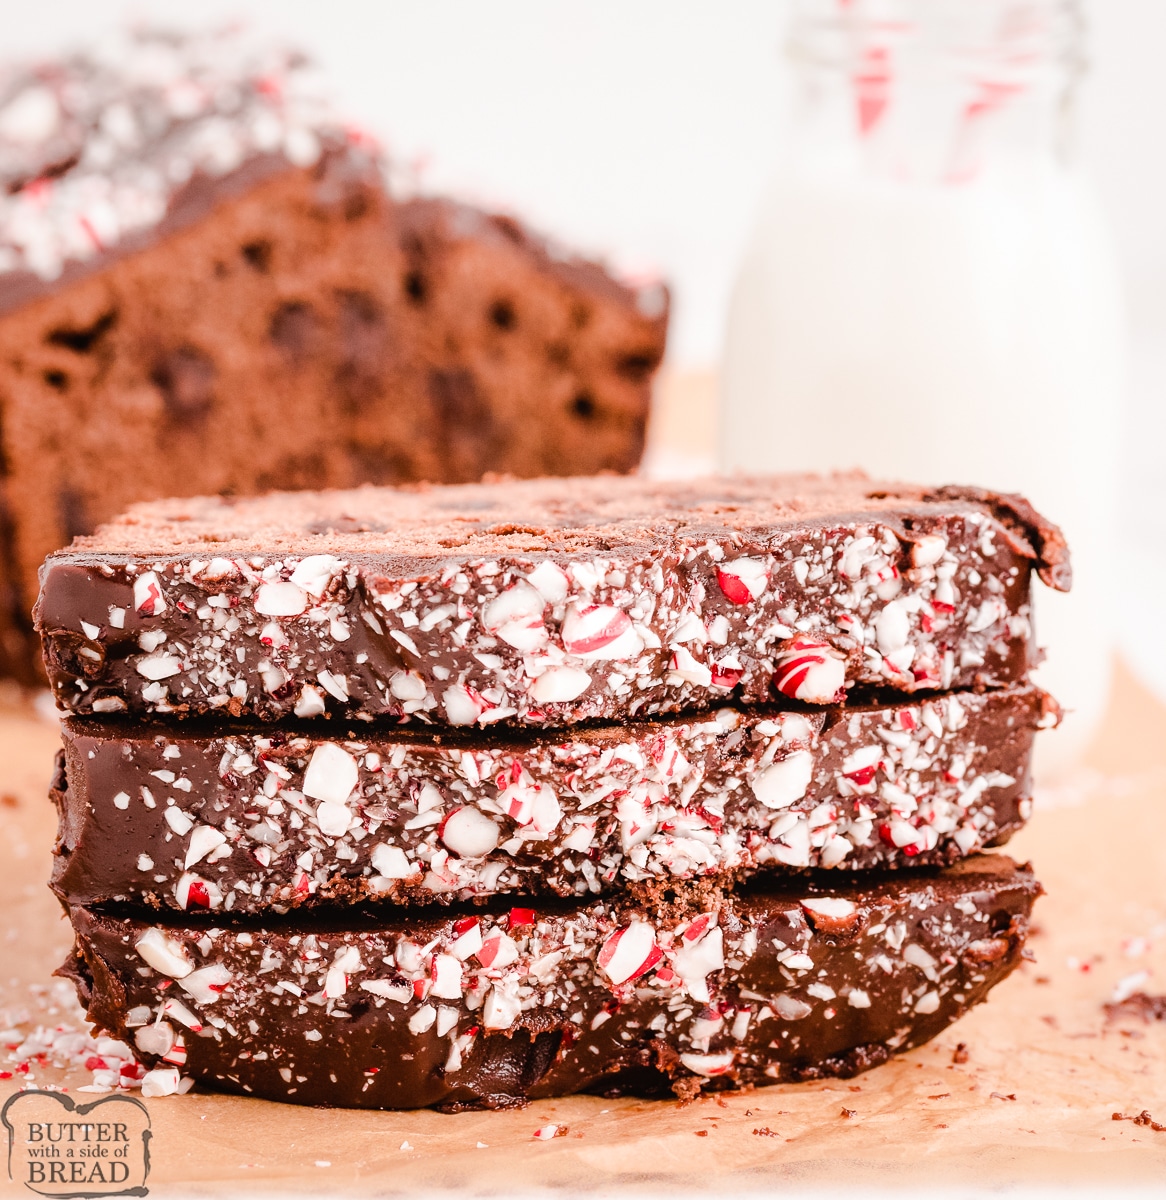
Chocolate chips: Add pockets of melty chocolate for extra indulgence.
Extract: Use 1 tsp of peppermint extract to infuse the bread with refreshing, festive flavor.
Chocolate Glaze
Chocolate: Chocolate chips melt into the base of the glaze for bold chocolate taste.
Whipping cream: Heavy whipping cream creates a smooth, rich texture.
Butter: ¼ cup butter adds silkiness and helps the glaze set.
Extract: Peppermint extract gives the glaze a cool, festive flavor.
Candy canes: 2 crushed candy canes add crunch, color, and holiday flair on top.
Tips for making this Chocolate Peppermint Bread
Full instructions in the recipe card below, but here are a few tips for helping with the baking process!
- Use room-temperature sour cream and eggs to help the batter blend smoothly—cold ingredients can cause the butter to solidify and create a dense loaf.
- Don’t overswirl the chocolate chips into the batter; gently fold them in so they stay suspended throughout instead of sinking to the bottom.
- Let the loaf cool completely before adding the glaze, or the warmth will thin the chocolate and prevent it from setting with that elegant finish.
How long is this Chocolate Chip Bread good for?
This chocolate peppermint bread stays fresh for 3–4 days when stored properly. Keep it tightly wrapped in plastic wrap or an airtight container at room temperature. If it has been glazed, place parchment or wax paper between layers to prevent sticking.
Can you freeze this chocolate bread loaf?
Yes! This loaf freezes beautifully. Wrap it in plastic wrap and a layer of foil, then freeze for up to 2–3 months. Thaw at room temperature, and if freezing glazed, freeze uncovered for 30 minutes first to set the topping and prevent smearing.
Chocolate Peppermint Bread
Ingredients
- ½ cup butter softened
- 1 cup sugar
- 2 eggs
- 1 cup sour cream
- 1 ¾ cups all purpose flour
- ½ cup cocoa powder
- 1 tsp baking powder
- 1 tsp salt
- ½ cup chocolate chips
- 1 tsp peppermint extract
Chocolate Glaze
- 1 ⅓ cups chocolate chips
- ½ cup heavy whipping cream
- ¼ cup butter
- ¼ tsp peppermint extract
- 2 crushed candy canes
Instructions
- Preheat the oven to 350 degrees. Grease a loaf pan, set it aside.
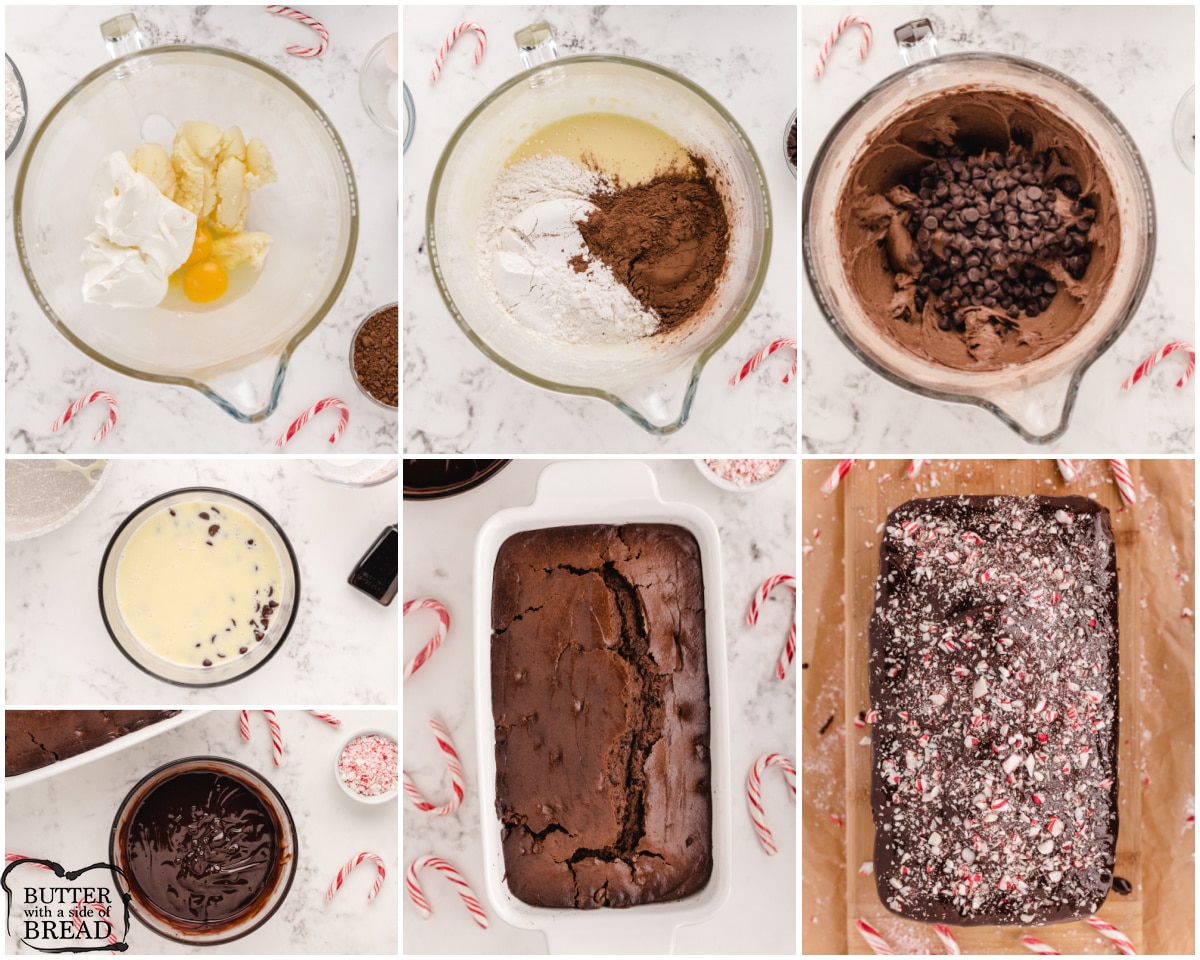
- In a large bowl, cream the butter and sugar together. Add in eggs and sour cream, beating until smooth and creamy.
- Add in he dry ingredients and mix until all combined. Stir in chocolate chips and peppermint extract.
- Spoon batter into a well greased loaf pan. Bake for 50-55 minutes, until toothpick inserted in center comes out clean. Let bread rest in pan for 20 minutes before removing to cool completely.
- For the chocolate glaze: Pour the chocolate chips in a medium sized bowl and set it aside.
- Then melt the butter in a small saucepan over medium heat. Add in the heavy cream when the butter is just about melted. Increase heat slightly and using a whisk, stir constantly, but gently. Heat until mixture just barely comes to a boil.
- Remove from the heat and pour the mixture over the chocolate in the bowl. Stir gently, combining the chocolate with the butter-cream mixture until it's smooth. Add in the peppermint extract and stir to combine.
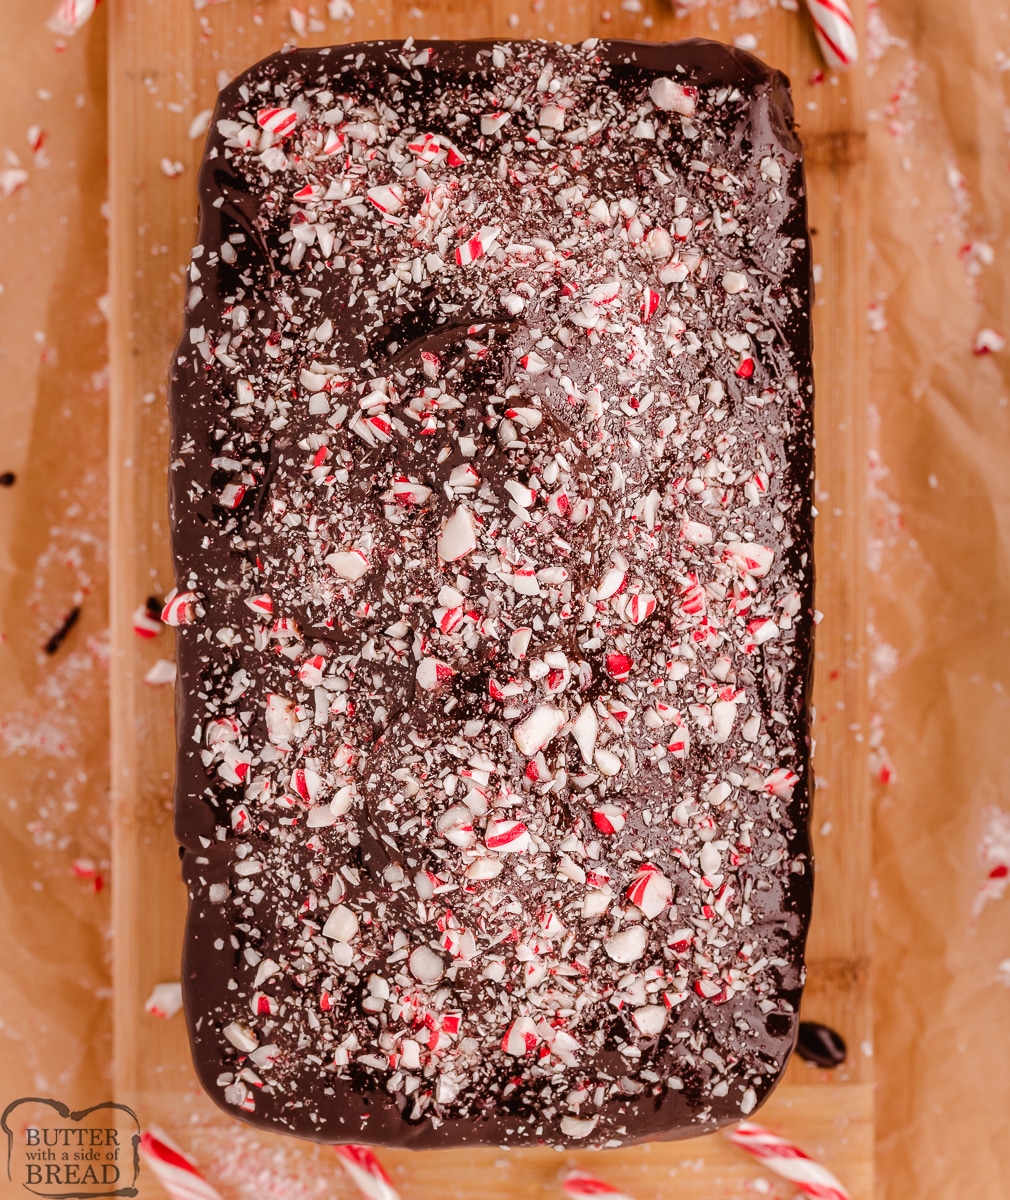
- Once bread has cooled, drizzle the glaze over the top, allowing it to drip down the sides as you'd like. I like the chocolate to be fairly cool at this point, so I spread enough on top to cover the bread, then drizzled it around so that some would go down the sides. Top with crushed candy canes. Serve & enjoy!
Notes
Nutrition
📫 Save this recipe! Send it to your email! 📩
I consent to receiving emails from this site.
Best Bread Pan?
I bake a lot of bread and the pans I prefer are either ceramic, glass, or cast iron. These pans will bake bread more evenly and release the bread more easily after baking. I don’t like using dark or nonstick pans because the bread cooks unevenly. It darkens on the outside before the bread is cooked on the inside, so the coloring is uneven. Read more about which bread pan is the best here!
Can I leave out the peppermint extract in this bread recipe?
Yes—simply omit the peppermint extract to make a classic chocolate loaf. You may add a little extra chocolate chips or a splash of vanilla extract to round out the flavor.
Avoid Sunken Break
The easiest and best way to avoid sunken bread is to use a cooking thermometer to check the inside of the loaf. Fully cooked bread will register 200°F on a thermometer. My all-time favorite thermometer is the Thermapen. It’s super fast and incredibly durable. Another great cooking thermometer is the ThermoPop which is a more basic version that works just as well!
Can I make this recipe ahead for gifting or parties?
Absolutely. This bread actually tastes even better the next day as the flavors deepen. Bake it a day in advance, wrap well once fully cooled, and add the glaze just before gifting or serving.
More amazing holiday quick bread recipes that we love here:
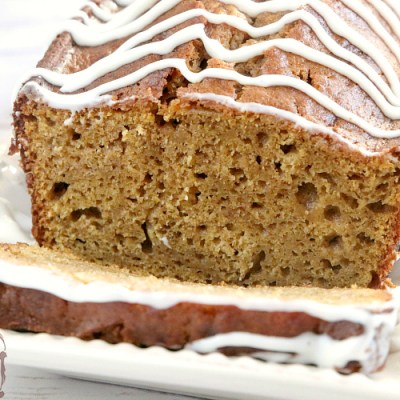
- This Dutch Apple Bread is bursting with fresh apple flavor, warm cinnamon, and rich buttery goodness. Finished with a crunchy streusel topping and a drizzle of warm vanilla glaze, it’s a cozy, irresistible treat perfect for the holiday season.
- Moist, tender, and filled with chocolate chips, this Pumpkin Chocolate Chip Bread captures all the cozy flavors of fall in every slice. A delicious and easy recipe you’ll want to bake all season long.
- Our Easy Cinnamon Roll Quick Bread captures all the sweet, spiced flavors of a classic cinnamon roll without the yeast. Soft, tender, and swirled with cinnamon sugar, it’s finished with a simple vanilla glaze for a perfectly indulgent treat.
- Enjoy the comforting taste of homemade Cinnamon Raisin Bread—no yeast required! This easy quick bread fills your kitchen with the most amazing scent and makes the perfect anytime snack.
- This Fresh Cranberry Orange Bread is bursting with bright citrus and tart cranberries. Easy to make and full of flavor, it’s a delightful treat for breakfast, brunch, or an afternoon snack.
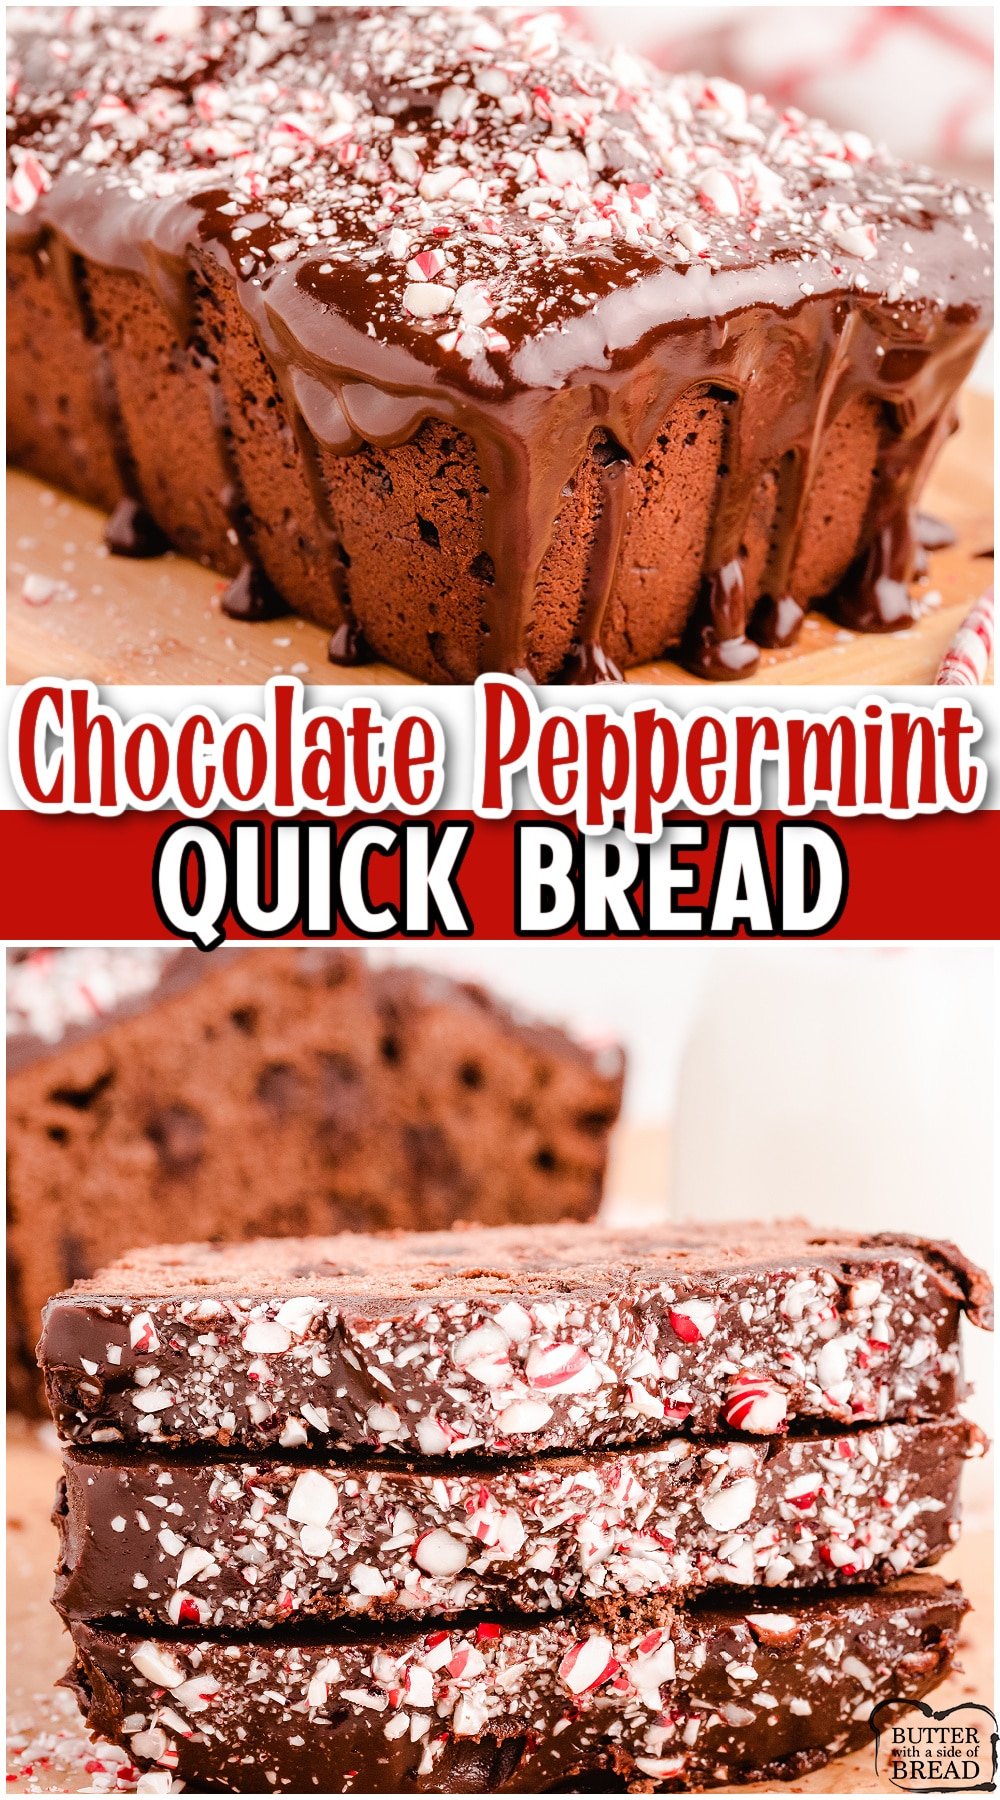
This Chocolate Peppermint Bread is a festive holiday treat packed with rich chocolate and a refreshing hint of peppermint. Soft, moist, and full of flavor, it’s perfect for breakfast, dessert, or gifting to friends and family.


Mary Johnson says
Thank you.Cant wait to try some of these.Especially the brownies…With a diebetic and hyproglysemic both in 1- house.God Bless you.
Diane Floyd says
Delicious recipe. Thank you so much. This was fun to make and the peppermint was the perfect amount in the bread and topping.
Jessica says
So glad you enjoyed it Diane!
Flixy Hanssen says
This bread was amazing!! It was the best thing I have ever had. Lol
Living on your own, it is amazing to just come back from a long stressful day at work, (and not have to bake, or have other people waste their time for you just to make bread) and enjoy a slice or 2.
Thanks for writing the recipe!
Ha det!! Av til kjøkkenet for å lage et annet brød!
Alison says
Thanks Flixy! So glad you are able to enjoy it!
Victoria Rook says
Can you make these and freeze them? I’m doing a Christmas boutique at my church on December 7th and I’m selling breads, and I was wondering if they’d be okay if I make the breads in the middle of November will they still be good?
Jessica says
Yes, I’d freeze the bread and then add the chocolate topping just before you plan to sell it!
Crystal says
I made mini loaves. Just wondering if they have to be refrigerated because of ganache topping? Thx
Jessica says
I like to refrigerate it, then take it out to serve. It can sit on the counter for hours and be fine. Enjoy.
Donna says
I loved the bread!!! I am started to think about the holidays. the holidays. The recipe says it will make 3 mini loaves. How long do you bake them?
Nellie says
Mini loaves will bake for about 35-40 minutes.
rebecca L oneill says
Can you make this in a bundt?
Jessica says
I think that sounds amazing!!
shri says
this recipe looks awesome! how long would this bread stay without the fridge? I’m thinking of sending it in the mail (4-5 days devliery) and hoping it doesn’t get spoilt 🙁
Nicole says
If you plan on mailing the bread I do not recommend topping it with the chocolate first. Send the bread without the chocolate on top as that will most likely melt and cause the bread to spoil before it arrives. …after your bread has cooled completely, wrap it well in multiple layers of plastic wrap and then store in an airtight container. Place that container in your mailing package and send it immediately. The bread is good for up to 5 days but if properly stored it may last a little longer. Tell the recipient to immediately place it into their fridge for storage upon arrival to squeeze an extra day or two out of it, or tell them to freeze half of the loaf for future snacking.
Cindy Seguin says
Your recipe looks amazing! so I thought I’d give it a try. I do have a question. The dough seems to be thick, is that normal?
Jessica says
Well it’s normal for this recipe, ha! Quick bread batter does vary in thickness. This one is a tad sturdier as it has to be to support the ganache glaze + peppermint pieces. It’s wonderful!
Sandy says
Is there a way to wrap this so the candy canes don’t “melt”? I understand not freezing it with them and the drizzle, but how to gift without wrapping? I’ve made them before and many enjoyed them!
Jessica says
That would be sort of tricky as candy canes are just candy- they tend to melt when combined with the chocolate ganache. My idea to combat the melting is to make a chocolate icing instead of a ganache- do a powdered sugar icing and add some cocoa powder. I’d add 1 TBSP to 1.5 cups powdered sugar. Try to put as little liquid as possible, you can even use hot water instead of milk. It sets super fast and although it wouldn’t have the exact same look as the chocolate ganache, I’d imagine the candy canes would fare much better!
Karri Brockman says
I’m new to this baking obsession but this bread was so simple to make! I made 3 mini loaves, 1 for each of my son’s teachers. I added just a but of crushed up peppermint in the batter as well as the extract & it was a hit! We made the peppermint christmas ornaments too & just laid that on top of the ganache instead of more crushed peppermint. So cute!